How to statically decrypt the CypherIT commercial packer.
Last article I wrote I tackled the CypherIT crypter as well as Nanocore internals. At that point I wasn't able to statically decrypt CypherIT. This was due to the fact that I wasn't able to identify the shellcode that was being loaded to decrypt the actual payload. I extended my DecypherIT tool located here, to identify the shellcode. With the shellcode identified the encryption technique it used became clear and I knew how to statically decrypt CypherIT packed samples.
Analysis
For this portion of the analysis, I reversed as much of the script as I could manually then worked to identify the patterns. That version of this script can be found here. Identifying the shellcode really became a task of trial and error. I knew windows API calls were going to be used to load the shellcode so that was my starting point. These were the interesting calls I was able to identify.


Now we know a VirtualAlloc is going to be required due to the fact that the shellcode is being generated dynamically and needs to be loaded into memory. Looking at the signature
LPVOID VirtualAlloc(
LPVOID lpAddress,
SIZE_T dwSize,
DWORD flAllocationType,
DWORD flProtect
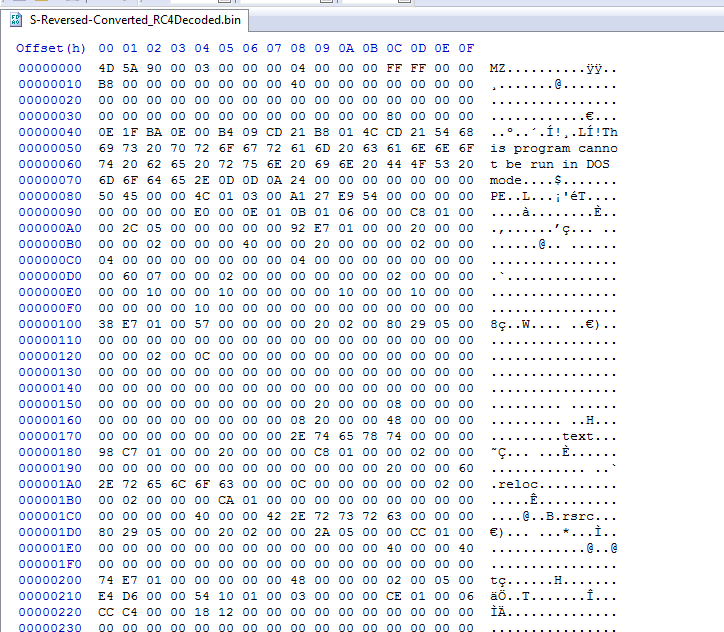
);Looking at the image above, lpAddress is 0, dwSize is the length of the shellcode plus the encrypted contents, flAllocationType is 0x3000 which from the MSDN docs shows that its using the MEM_COMMIT and MEM_RESERVE options, and flProtect is PAGE_EXECUTE_READWRITE. The fact the this allocated memory has execute permissions means its going at least part of the memory written here is shellcode. Now this call is located within a function I have renamed DecryptLargeBlobWithShellcode. Now the Go utility I wrote can extract the shellcode that is being written to this memory.

Following the variable DecrpytionShellcode back its being set via a single call that I have simplified by manual analysis.

A tool that I use for quickly loading shellcode is Radare2's frontend application Cutter.

Cutter was able to identify a function and it does seem to be valid shellcode. When I saw this I immediately notice the little loop after the mov ecx, 0x100. Now 0x100 is 256 in decimal. This constant along with the loop made me think of RC4, since this is very similar to RC4's S box. If you aren't aware of how RC4 works, the good people over at OpenAnalysis created a great video on how it works located here. The main difference between this implementation and the ones I have seen in the past, is this one works bacwards. It starts with sbox[255] = 256 rather than sbox[0] = 0. Now after talking with David Ledbetter, he informed that the S box creation can still be implemented in this way and from that he had quickly decrypted the payload and the work was over!
So the majority of this update is due to him, but I figured I'd write a more definitive guide to CypherIT as I'm seeing it more in the wild. Looking back at our mysterious shellcode call, we can see there are 4 arguments, the pointer to the shellcode, the length of the encrypted contents, the encryption key and a extraneous 0.
With this information we are ready to create a simple decryption program.
Decryption with CyberChef
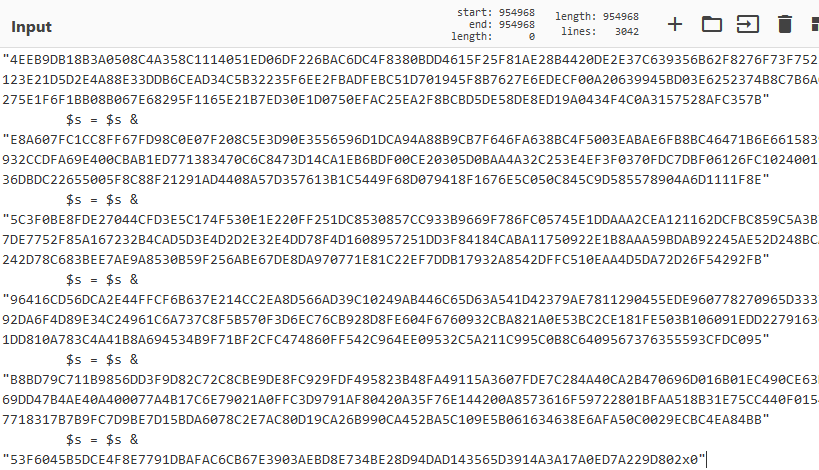
Now if you aren't one to use cyberchef, I highly recommend you check it out. I use cyberchef daily as it makes data transformations incredibly easy and recipes can be shared among analysts. To start, copy the large blob from this location:

Copy until the end of the blob

Paste that contents in the cyberchef recipe located here. Your input should look something like the following
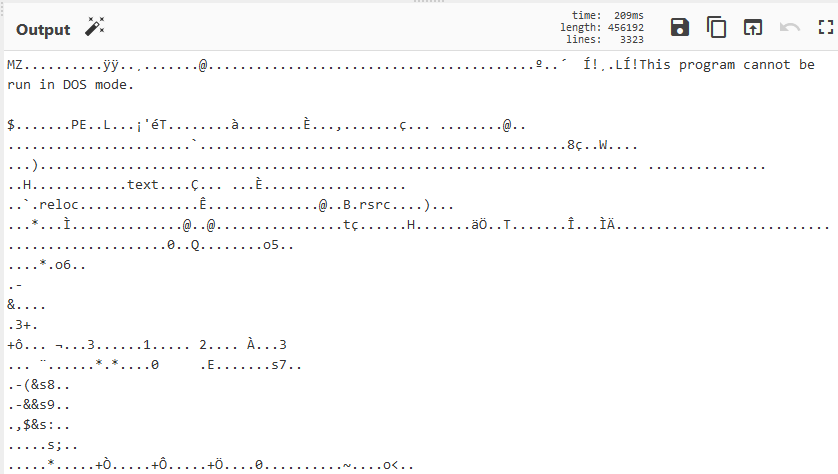
Now for the RC4 password, its passed as the string argument after this blob is set.

So in this case, for the last step in the cyberchef recipe, fill in the password as SDJOTYYXHU. If all went well you should see the MZ header and you have your payload!
Hopefully this helps clear up some of the questions I left around CypherIT in the previous blogpost.